Accurate body measurements are essential for ensuring a perfect fit, whether you’re shopping for clothes1, tailoring an outfit, or creating custom garments. Taking measurements properly can save you time and money while helping you avoid ill-fitting clothing.
To take body measurements for clothing, you need a measuring tape, a mirror, and a notepad. Focus on key areas such as the chest, waist, hips, and inseam, and follow clear body measurement guidelines2 for accuracy.
This guide will walk you through the process of taking body measurements step-by-step, explain common mistakes to avoid, and provide tips for getting precise results.

Why Are Accurate Measurements Important?
Getting accurate measurements ensures clothing fits well and looks flattering.
1. Perfect Fit
- Properly measured clothing enhances your comfort and appearance.
- Custom garments and tailored clothing require precise dimensions.
2. Saves Time and Money
- Reduces the hassle of returns and alterations when shopping online or in-store.
- Ensures a smoother process for dressmakers, tailors, or designers.
3. Essential for DIY Projects
Home sewers and fashion designers rely on accurate measurements to create garments that fit perfectly, so follow best measuring practices3.
Tools You’ll Need
Before starting, gather the right tools to make the process easier and more accurate.
- Measuring Tape: Use a soft, flexible tape specifically designed for body measurements4.
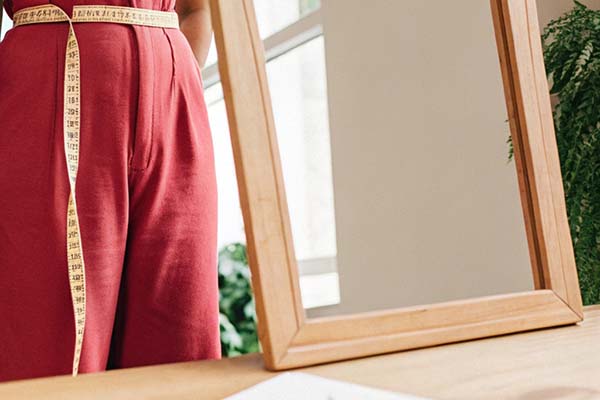
- Mirror: A full-length mirror helps ensure correct positioning of the tape.
- Notepad or App: Record measurements to avoid errors.
- Assistant (Optional): Someone to help you measure areas like your back for improved precision.
Key Body Measurements for Clothing
Here are the most common body measurements required for tailoring or shopping:
1. Chest or Bust
How to Measure:
- Wrap the measuring tape around the fullest part of your chest or bust.
- Keep the tape level across your back.
- Stand naturally without puffing out your chest.
Tip: Ensure the tape is snug but not tight.

2. Waist
How to Measure:
- Find your natural waistline, located just above the belly button.
- Wrap the tape around your waist, keeping it parallel to the floor.
- Relax your stomach for an accurate measurement.
Tip: Don’t pull the tape too tight or too loose.
3. Hips
How to Measure:
- Stand with your feet together.
- Measure around the fullest part of your hips and buttocks.
- Keep the tape straight and parallel to the floor.
Tip: Ensure the tape doesn’t ride up on the back.
4. Inseam
How to Measure:
- Measure from the crotch seam to the bottom of your ankle.
- Stand straight and barefoot for accurate results.
Tip: Use a pair of well-fitting pants as a guide if needed.
5. Shoulders
How to Measure:
- Measure from the tip of one shoulder to the other across your back.
- Ensure the tape is straight and level.
Tip: Ask someone to help for better accuracy.
6. Sleeve Length
How to Measure:
- Measure from the top of your shoulder to your wrist bone.
- Keep your arm slightly bent during the measurement.
Tip: Use the same posture you’d have while wearing a shirt.
7. Neck
How to Measure:
- Wrap the tape around the base of your neck where a collar would sit.
- Allow a finger’s width of space for comfort.
Tip: Take this measurement snugly for dress shirts.
8. Height
How to Measure:
- Stand barefoot against a wall with your heels touching the base.
- Use a ruler or flat object to mark the top of your head on the wall, then measure the distance to the floor.
Tip: Keep your posture upright for an accurate result.

Step-by-Step Guide to Taking Body Measurements
Step 1: Wear the Right Clothing
- Dress in form-fitting clothes or undergarments to avoid bulk interfering with measurements.
Step 2: Use a Consistent Method
- Always measure the same way (e.g., over bare skin or thin layers).
Step 3: Stand Naturally
- Maintain a relaxed posture without sucking in your stomach or holding your breath.
Step 4: Double-Check Your Results
- Repeat each measurement at least twice to ensure accuracy.
Tips for Taking Accurate Measurements
1. Use a Mirror
- A full-length mirror helps you position the tape correctly and ensures it stays level.
2. Avoid Measuring Too Tightly
- Measurements should be snug but not restrictive, as tight measurements can lead to uncomfortable clothing.
3. Record in Inches and Centimeters
Some brands or tailors may prefer one unit over the other, so keep both on hand or refer to an inches to centimeters conversion chart5.
Common Mistakes to Avoid
1. Incorrect Tape Placement
- Ensure the tape is straight and level, not sagging or angled.
2. Overestimating or Underestimating
- Stand naturally to avoid inflating or reducing your measurements.
3. Skipping Key Areas
- Don’t forget less obvious measurements like sleeve length or shoulder width, especially for tailored garments.
When to Update Your Measurements
Regularly updating your measurements ensures your clothing fits well, especially if your body changes.
- After Weight Changes: Significant weight loss or gain affects clothing fit.
- Yearly Check-Ins: Measure annually to account for subtle changes over time.
- Before Custom Orders: Always take fresh measurements for tailored or custom-made clothing.
Why Professional Tailors Use Multiple Measurements
Professional tailors often take additional measurements for a more precise fit:
- Thighs: Ensures pants fit comfortably around the upper leg.
- Torso Length: Important for dresses or jumpsuits.
- Rise: Determines how pants sit on your waist.
Conclusion
Taking body measurements for clothing doesn’t have to be intimidating. With the right tools and techniques, you can ensure that your garments fit perfectly and flatter your figure. By following this guide and avoiding common mistakes, you’ll have accurate measurements ready for tailoring, shopping, or DIY projects. Whether it’s for casual wear or a custom suit, precision is key to looking and feeling your best.
-
Discover how accurate measurements simplify both online and in-store clothing purchases. ↩
-
Learn professional standards and tips for measuring key areas like chest, waist, and hips. ↩
-
Get detailed guidance for accurate DIY measurements to ensure a great garment fit. ↩
-
Explore trusted techniques and tools for precision in DIY sewing or tailoring. ↩
-
Quickly convert between imperial and metric units when taking or recording measurements. ↩


