Skip to content
Making a shirt from scratch may seem intimidating, especially if you’re new to sewing. But with the right tools, fabric, and guidance, it’s completely doable—even at home.
To make a shirt from scratch, you’ll need fabric, a pattern, basic sewing tools1, and a step-by-step process that includes designing, cutting, stitching, and finishing.
The first shirt I ever made was uneven, slightly crooked—but I still wore it proudly. If you’re ready to start your own shirt-making journey, here’s how to do it the right way.
What Materials and Tools Do You Need to Make a Shirt?
Getting started begins with gathering the right fabric and tools. Don’t worry—most of them are affordable and beginner-friendly.
To make a shirt, you’ll need suitable fabric, a sewing machine or needle, scissors, measuring tape, and a pattern to guide you.
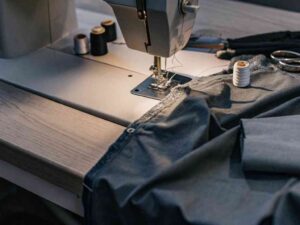 Sewing Machine Detail
Which fabrics are best for making a custom shirt?
It depends on the style—dress shirt or casual tee?
Cotton poplin, twill, linen, and cotton jersey are popular fabrics for custom shirts, each offering different structure and comfort levels.
- Poplin (Broadcloth): Crisp, smooth, perfect for formal button-downs.
- Linen: Breathable and textured—great for summer.
- Cotton Jersey: Stretchy and soft—ideal for t-shirts.
- Chambray or Flannel: For casual, relaxed shirts.
| Fabric Type | Best For | Characteristics |
|---|---|---|
| Cotton Poplin | Dress Shirts | Smooth, holds shape well |
| Jersey Knit | T-Shirts | Soft, stretchy, casual |
| Linen | Summer Wear | Lightweight, breathable |
| Twill | Work Shirts | Dense, strong, resists wrinkles |
What basic sewing tools and equipment are required?
You don’t need a factory to start—just the essentials.
The must-haves include scissors, measuring tape, pins, chalk, iron, and a sewing machine (or needle/thread if sewing by hand).
- Fabric Shears: Clean cuts without fraying.
- Pins & Clips: Hold layers together before sewing.
- Tailor’s Chalk or Washable Marker: To mark fabric.
- Sewing Machine: Speeds things up and ensures consistent stitching.
- Iron & Ironing Board: For pressing seams—makes a huge difference in quality.
How to Design Your Shirt Before Cutting the Fabric?
Before touching fabric, get the design and fit right. This avoids waste—and disappointment.
Start with a paper or digital pattern, refine your measurements, and visualize your design before cutting.

Should you start with a paper pattern or digital design?
Either works—depending on your comfort.
Paper patterns are easier for beginners, while digital patterns are editable and reusable for advanced makers.
- Paper Patterns: Can be printed or purchased. Ideal for easy modifications.
- Digital Patterns (PDF or CAD): Let you scale, adjust, and archive for future use.
- Where to find patterns: Look for free or paid templates from platforms like Etsy, Seamwork, or BurdaStyle.
How to take accurate body measurements for a perfect fit?
Getting the right measurements is key to fit and comfort.
Use a flexible tape to measure chest, waist, hips, shoulders, sleeve length, and shirt length. Always measure over thin clothing.
| Body Area | Measurement Tip |
|---|---|
| Chest | Measure around fullest part |
| Waist | Measure at the narrowest part |
| Shoulders | From shoulder tip to tip across back |
| Sleeve Length | From shoulder seam to wrist |
| Shirt Length | From neck base to desired shirt end |
Take measurements twice to double-check, and jot them down before starting your pattern.
What Are the Key Steps to Sewing a Shirt from Scratch?
This is where your shirt comes to life—cutting, stitching, and assembling the fabric.
Start by cutting fabric with your pattern, then sew key parts in order: shoulders, sleeves, sides, collar, and hems. Press as you go.
How do you cut the fabric using your pattern layout?
Precision here saves time and fabric.
Lay your fabric flat, align the pattern with the grainline, pin it, and cut slowly with fabric scissors.
- Use a cutting mat and rotary cutter for extra precision.
- Make sure to mirror left/right pieces (e.g., sleeves).
- Add seam allowance2 if your pattern doesn’t include it—usually 1 to 1.5 cm.
What’s the correct order for stitching sleeves, collars, and hems?
Follow a logical order to make construction easier.
Sew shoulder seams first, then attach sleeves, followed by side seams, collar, button placket, and finally hems.
- Shoulder Seams – Set foundation.
- Sleeves – Attach flat if possible, then sew sides.
- Side Seams – Join body front and back.
- Collar or Neckline – Attach carefully, especially in woven shirts.
- Cuffs/Hems – Press before stitching to ensure crisp finish.
- Finishing Touches – Buttonholes, labels, and topstitching.
Pressing every seam before moving on improves fit and finish.
How to Add Details Like Buttons, Pockets, or a Logo?
This is where your shirt becomes yours—custom branding, personality, and functionality.
Use proper tools to attach hardware, and personalize with embroidery or heat transfers for logos and branding.
Precision matters—especially on the front placket.
Mark button positions, stabilize the fabric, and use a machine’s buttonhole function or zipper foot for accuracy.
- Buttonholes: Use interfacing underneath to prevent stretching.
- Buttons: Sew on using a shank (loop of thread) so fabric can close smoothly.
- Zippers: Use basting stitches first, then sew cleanly with a zipper foot.

Can you add custom logos3 with embroidery or heat transfer?
Absolutely—and both give professional results if done right.
Use embroidery for a durable, premium look; heat transfer is better for vivid logos and fast application.
| Method | Pros | Best For |
|---|---|---|
| Embroidery | Durable, textured, luxe | Branding, initials, logos |
| Heat Transfer | Fast, colorful, cost-effective | Graphic logos, limited runs |
| Screen Print | High volume, bold colors | Mass production, merchandising |
Make sure fabric is heat-resistant if using transfers, and always test a swatch first.
What Are Common Mistakes to Avoid When Making Your First Shirt?
Even experienced sewers make mistakes—but many can be avoided with planning and patience.
Beginners often misjudge sizing, stretch fabric unevenly, or skip pressing steps—leading to a poorly finished shirt.
What sizing or seam errors do beginners often make?
Improper fit and weak seams are most common.
Ignoring seam allowance, misaligning pattern pieces, or mis-measuring can cause sizing issues or unstable construction.
- Always double-check measurements before cutting.
- Don’t forget to label front vs. back pieces.
- Sew slowly around curves (like armholes) to keep shape intact.
How can you prevent puckering, uneven stitching, or fabric shrinkage?
Patience and prep solve most of these.
Use the right needle and tension for your fabric, pre-wash cotton fabrics to prevent shrinkage, and press after every seam.
- Puckering: Caused by high tension or wrong stitch length.
- Uneven Stitching: Can be solved with proper pinning and slow stitching.
- Shrinkage: Pre-wash all natural fabrics before cutting.
Conclusion
Making a shirt from scratch isn’t just a project—it’s a craft. With the right fabric, tools, and step-by-step process, even beginners can create something they’ll be proud to wear.
-
Understanding the essential tools will help you start your sewing journey effectively and avoid common pitfalls. ↩
-
Knowing about seam allowance is crucial for achieving the right fit and finish in your sewing projects. ↩
-
Learn the best methods for adding logos to your shirts, enhancing your designs with professional quality. ↩