Most people love the look of custom tees, but have no idea how they’re made. They think it’s complicated or needs a factory setup. The truth? Screen printing is easier than you think—and I’ll walk you through it.
To screen print a custom t-shirt, you need to create a stencil on a mesh screen, push ink through the design onto the shirt, and cure the ink properly. With the right tools and steps, anyone can get crisp, professional results.
When I first tried it, I ruined a few tees. But after mastering the technique, I turned it into a full-service offering for clients. Whether you’re printing one shirt at home or 500 for a brand, here’s everything you need to know.
What Is Screen Printing and Why Is It Popular for Custom T-Shirts?
Screen printing has been around for centuries. But it’s more popular than ever in fashion and custom merch.
Screen printing uses a mesh screen and stencil to apply layers of ink on fabric. It’s preferred for custom t-shirts because it’s affordable, durable, and ideal for bold designs.
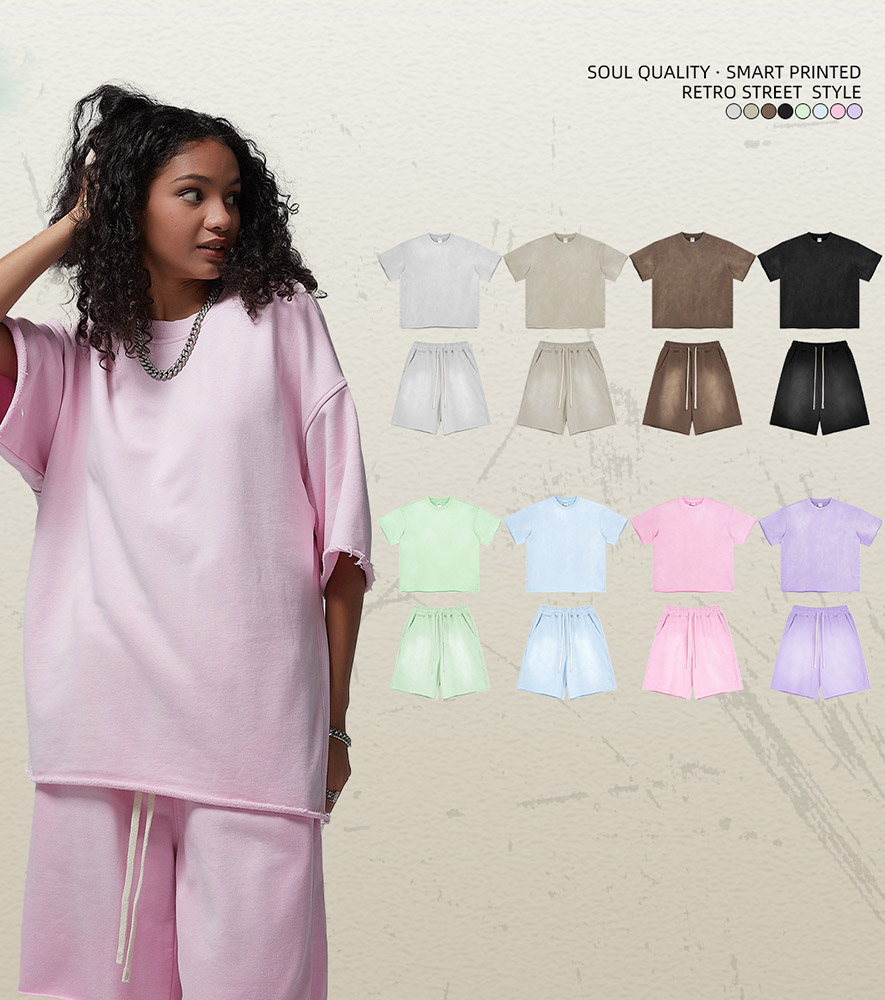
 Printed T-Shirts
How does screen printing1 work on fabric compared to other methods?
Heat transfer, direct-to-garment, and vinyl all have their place. But screen printing excels when you need durability.
- Ink sits on top of the fabric rather than soaking in, making it more vibrant.
- Thicker ink layers last longer through wash cycles.
- Batch printing is much more cost-effective.
For example, in bulk orders for our clients at Modaknits, we always choose screen printing for bold logos and consistent color.
Why is screen printing preferred for bold and long-lasting designs?
Screen printing lets you use plastisol inks2, which are thicker and more opaque. This helps:
- Avoid faded or patchy prints
- Achieve solid colors even on dark fabrics
- Reduce cracking with proper curing
Compared to water-based inks in digital methods, screen-printed designs look bolder, feel more substantial, and resist peeling.
What Materials and Tools Are Needed for T-Shirt Screen Printing?
When starting out, you don’t need to break the bank. But quality tools make a big difference.
To screen print, you’ll need a mesh screen, emulsion, squeegee, ink, transparency film, a light source to burn the stencil, and a flat surface. Optional tools include a heat press3 or flash dryer.
What type of screens, inks, and emulsions are best for beginners?
Start with aluminum frame screens with 110 to 160 mesh count—versatile for most t-shirts.
- Inks: Plastisol is beginner-friendly because it doesn’t dry until cured.
- Emulsion: Pre-sensitized emulsions simplify the exposure process.
- Film: Use laser-printed transparencies for sharp artwork.
| Tool | Recommended Option for Beginners |
|---|---|
| Screen Mesh | 110-160 mesh count, aluminum frame |
| Ink | Plastisol (vibrant, doesn’t dry until cured) |
| Emulsion | Pre-sensitized (no mixing needed) |
| Squeegee | 70 durometer flat edge |
Do you need a heat press or special drying equipment?
Not at the beginning, but curing ink is critical.
- Plastisol ink needs to hit around 320°F (160°C) to set permanently.
- You can use a heat gun, flash dryer, or even household oven if careful.
- For bulk orders, we use a conveyor dryer to ensure even curing.
Just make sure the ink doesn’t feel tacky—otherwise, it will crack after washing.
Step-by-Step Guide to Screen Printing a Custom T-Shirt
The process seems intimidating, but it breaks down into clear, repeatable steps.
Prepare your artwork, burn your screen, apply ink with a squeegee, and cure the design with heat. That’s it.

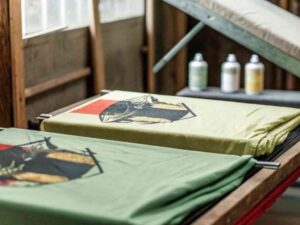
How do you prepare the screen and apply the stencil?
Here’s the typical preparation process:
- Print your design onto a transparency film.
- Coat your screen with photo emulsion in a dark room.
- Let it dry flat for 4–6 hours.
- Expose the screen to a UV light source with the transparency taped on top.
- Rinse the screen with water—your design will appear as the clear stencil.
Pro tip: Time the exposure based on your emulsion brand. Overexposure = design won’t wash out.
What’s the right technique for applying ink evenly?
This part feels the most “manual,” but it’s also the most satisfying.
- Place the shirt on a flat board or platen.
- Lay the screen on top, aligned with the design area.
- Pour ink across the top of the screen.
- Use a squeegee at a 45° angle and pull the ink firmly across the screen.
- Repeat once or twice.
- Lift the screen carefully and let the shirt dry.
Avoid pressing too hard—this pushes ink under the stencil, making the print blurry.
Common Mistakes to Avoid When Screen Printing
Everyone makes mistakes early on. But they’re easy to avoid once you know the causes.
The most common mistakes include bleeding ink, undercured prints, bad alignment, and smudged stencils.
Why does ink sometimes bleed or crack after printing?
Bleeding usually means:
- You’re using too much ink
- Your screen mesh is too low
- The shirt wasn’t flat during printing
Cracking happens when:
- The ink isn’t cured at the right temperature
- You’re using low-quality or old ink
Always do a wash test after your first shirt in a batch. If it fades, cure longer.
How to fix alignment or registration issues in multi-color prints?
Aligning multi-color prints requires registration marks.
- Use clear tape and T-shirt test prints to get the placement right.
- Secure your screens in a press with hinge clamps.
- Mark your platen with reference lines for consistency.
If one color looks offset, your screen might have shifted mid-print. Use a press, not hand-held screens, for best results.

Tips to Get Professional-Quality Results at Home or in Bulk
You can get surprisingly good results at home if you plan properly.
Use quality materials, keep your workspace clean, and learn to troubleshoot common printing issues. Practice makes perfect.
Can you screen print custom t-shirts at home without expensive gear?
Absolutely. I started that way too.
- Use DIY screens with wooden frames
- Dry your emulsion in a closet
- Cure ink with a heat gun or oven
- Use painter’s tape and clamps for alignment
It takes patience, but the results can still wow your friends—or customers.
What are the best practices for printing high volumes with consistent quality?
Once you scale up, consistency is everything.
- Use a multi-station screen printing press
- Calibrate your screen height, tension, and ink viscosity
- Cure all shirts using a conveyor dryer
- Run quality checks every 20–30 prints
At Modaknits, we train our printing team to spot tiny defects early. That’s how we maintain a <1% defect rate—even on 5,000+ unit orders.
Conclusion
Screen printing a custom t-shirt is both an art and a process. With the right setup, you can create sharp, long-lasting prints at home—or scale up to bulk production with factory-level precision.
-
Explore this link to understand the fundamentals of screen printing, its history, and its advantages over other printing methods. ↩
-
Learn about plastisol inks, their properties, and why they are preferred for vibrant and durable prints in screen printing. ↩
-
Find out if a heat press is essential for screen printing and discover alternative methods for curing ink effectively. ↩