Skip to content
Accurate body measurements are essential when working with a dressmaker to ensure a custom garment fits perfectly. Whether it’s for a wedding dress, a formal gown, or a tailored outfit, following the correct steps to take precise measurements can make all the difference.
To measure for a dressmaker, focus on the key areas like bust1, waist2, hips, and length, ensuring the use of a flexible measuring tape and maintaining a natural posture. Accuracy is achieved by measuring snugly but not tightly.
In this article, we’ll guide you through the steps to take proper measurements for a dressmaker, tips for avoiding common errors, and best practices to ensure a flawless fit.
Why Accurate Measurements Matter
Tailored garments are designed specifically for your body, and incorrect measurements can result in poor fit or the need for extensive alterations. Here’s why precision is critical:
1. Perfect Fit
Custom clothing relies on accurate measurements to ensure it fits comfortably and flatters your body.
2. Saves Time and Money
Precise measurements minimize the need for adjustments, saving you time and reducing alteration costs.
3. Enhances Confidence
When your clothes fit perfectly, they look better and boost your confidence.
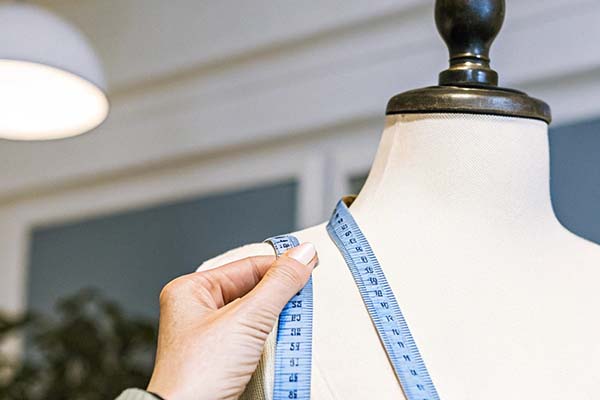
Tools Needed for Measurement
Before you begin, gather the following tools to ensure a smooth measuring process:
- Soft Measuring Tape: Flexible and ideal for wrapping around curves.
- Mirror: A full-length mirror helps verify correct tape placement.
- Notepad or App: Record measurements as you go for accuracy.
- Helper (Optional): Having someone assist can improve precision, especially for hard-to-reach areas.

Step-by-Step Guide to Measuring for a Dressmaker
1. Prepare Yourself
Wear the Right Clothing
- Dress in tight-fitting clothes or undergarments similar to what you’ll wear with the final garment.
- Avoid thick or bulky layers that can distort measurements.
Stand Naturally
- Maintain a relaxed posture with your arms at your sides.
- Don’t suck in your stomach or hold your breath, as this can lead to inaccurate waist measurements.
2. Measure the Key Areas
Here’s a breakdown of the most important measurements your dressmaker will need:
a. Bust
- Wrap the tape around the fullest part of your bust, usually over the nipple line, for correct bust measurement1.
- Ensure the tape is level across your back and snug without compressing.
b. Waist
- Locate your natural waist, which is the narrowest part of your torso (just above the belly button).
- Wrap the tape snugly but comfortably around your waist, following the measuring waist technique2.
c. Hips
- Measure around the widest part of your hips and buttocks for measuring hips accurately3.
- Keep the tape parallel to the floor for an accurate reading.
d. Shoulder Width
- Measure from the tip of one shoulder to the tip of the other across your back.
- Refer to how to measure shoulder width4 for more precise guidance.
e. Back Length
- Start at the base of your neck and measure down to your natural waist.
- Keep the tape flat against your back for precision.
f. Sleeve Length
- Measure from the edge of your shoulder to your wrist bone.
- Slightly bend your arm to ensure the sleeve will be long enough when worn.
g. Dress Length
- Measure from the hollow at the base of your neck down to the desired hemline.
- For floor-length dresses, ensure you’re wearing the shoes you plan to wear with the dress.
3. Verify Your Measurements
- Repeat each measurement to confirm accuracy.
- Ask a friend or family member to double-check key measurements like bust, hips, and length.
4. Record and Label
- Write down each measurement clearly, using labels like “bust,” “waist,” and “hips” to avoid confusion.
Additional Measurements for Custom Dresses
For more complex garments, your dressmaker may require additional measurements:
| Measurement | How to Measure |
|---|---|
| Armhole Circumference | Wrap the tape around the armhole where the sleeve will sit. |
| Upper Arm Girth | Measure around the widest part of your upper arm. |
| Thigh Circumference | Wrap the tape around the fullest part of your thigh. |
| Neck Circumference | Measure around the base of your neck for high-necked designs. |

Common Mistakes to Avoid
Even slight errors can lead to ill-fitting garments. Here’s how to avoid common measurement errors5:
1. Measuring Over Loose Clothing
Baggy clothing can add extra inches, resulting in poor fit.
2. Using the Wrong Tape
Rigid tools like rulers or metal tapes don’t contour to the body.
3. Holding Your Breath
Relax and stand naturally for authentic waist measurements.
4. Improper Tape Placement
Ensure the tape stays level and doesn’t sag or tilt during measurement.
Tips for Accurate Measurements
- Use a Flexible Tape – Soft measuring tape contours to your body.
- Measure Multiple Times – Take each measurement at least twice to confirm.
- Stand Still – Avoid moving or shifting mid-measurement.
- Update Regularly – Recheck measurements if taken weeks or months in advance.
How Dressmakers Use Measurements
- Pattern Creation – Measurements guide the drafting of patterns tailored to your proportions.
- Adjustments – Dressmakers fine-tune pre-made patterns for a custom fit.
- Mock Fittings – Provides the basis for creating muslin test garments prior to cutting expensive fabric.
Caring for Your Measurement Notes
Keep your measurement records organized:
- Store them digitally for quick access.
- Label each entry with the date to track any body changes over time.
Conclusion
Taking accurate body measurements is the cornerstone of creating a beautifully fitted garment. By focusing on key areas, maintaining proper posture, and avoiding common pitfalls, you’ll set the stage for a flawless custom design. Whether it’s a wedding gown or a tailored suit, correct measurements pave the way for comfort, style, and confidence in your finished piece.
-
Learn techniques for getting precise bust measurements for a tailored fit. ↩ ↩
-
Discover how to find and measure the natural waist accurately. ↩ ↩
-
Understand best practices for ensuring accurate hip measurements every time. ↩
-
Get detailed instructions on properly measuring shoulder width for dresses and jackets. ↩
-
Explore tips and insights to prevent mistakes during the measuring process. ↩