Skip to content
Customizing shirts and hoodies with your own designs is an exciting way to showcase creativity, start a clothing line, or promote your brand. From simple DIY methods to professional techniques, there are various ways to achieve high-quality results.
Putting a design on a shirt or hoodie involves methods like screen printing1, heat transfer2, sublimation3, or embroidery4, each suited to different designs and materials.
Let’s explore the steps and techniques to bring your ideas to life.
How do I put an image on a hoodie?
Transferring an image onto a hoodie requires selecting the right technique based on the fabric type and design complexity.
To put an image on a hoodie, you can use heat transfer vinyl2, sublimation printing3, or screen printing, depending on your resources and desired finish.

Step-by-Step Guide for Popular Methods
1. Heat Transfer Vinyl (HTV)
- Best For: Bold, simple designs or text.
- Materials Needed:
- Heat transfer vinyl
- Cutting machine (e.g., Cricut or Silhouette)
- Heat press or household iron
Process:
- Create your design using graphic software.
- Cut the design onto the HTV using a cutting machine.
- Weed (remove) the excess vinyl around your design.
- Place the vinyl design on the hoodie and apply heat using a heat press or iron.
2. Sublimation Printing
- Best For: Full-color, vibrant designs on polyester hoodies.
- Materials Needed:
- Sublimation printer and ink
- Sublimation paper
- Heat press
Process:
- Print your design on sublimation paper using sublimation ink.
- Position the paper on the hoodie and secure it with heat-resistant tape.
- Use a heat press to transfer the design onto the fabric.
3. Screen Printing
- Best For: Bulk production or large, detailed designs.
- Materials Needed:
- Screen printing frame and mesh
- Fabric ink
- Squeegee
Process:
- Create a stencil of your design on the screen.
- Lay the screen over the hoodie and apply ink evenly using a squeegee.
- Allow the ink to dry and cure for long-lasting results.
Pros and Cons of Each Method
| Method | Advantages | Disadvantages |
|---|---|---|
| Heat Transfer Vinyl | Easy and affordable for beginners | Limited durability |
| Sublimation Printing | Vibrant, long-lasting results | Requires polyester-based fabrics |
| Screen Printing | Cost-effective for bulk orders | Time-consuming for small runs |
How do you put your own design on a shirt?
Customizing a shirt with your own design can be a rewarding DIY project or a professional venture.
To put your design on a shirt, use techniques like heat transfer paper, direct-to-garment (DTG) printing5, or embroidery, depending on your tools and fabric.
Step-by-Step Techniques
1. Heat Transfer Paper
- Best For: Photo-quality designs or complex images.
- Materials Needed:
- Heat transfer paper
- Inkjet or laser printer
- Iron or heat press
Process:
- Print your design onto heat transfer paper using an inkjet or laser printer.
- Cut out the design, leaving a small margin around the edges.
- Place the paper face-down on the shirt and apply heat.
- Peel off the backing paper to reveal the transferred image.
2. Direct-to-Garment (DTG) Printing
- Best For: High-resolution, multicolor designs on cotton shirts.
- Materials Needed:
- DTG printer5
- Pretreatment solution (for dark fabrics)
Process:
- Pretreat the fabric to ensure the ink adheres properly.
- Load the shirt onto the DTG printer and print the design directly onto the fabric.
- Cure the ink with a heat press for durability.
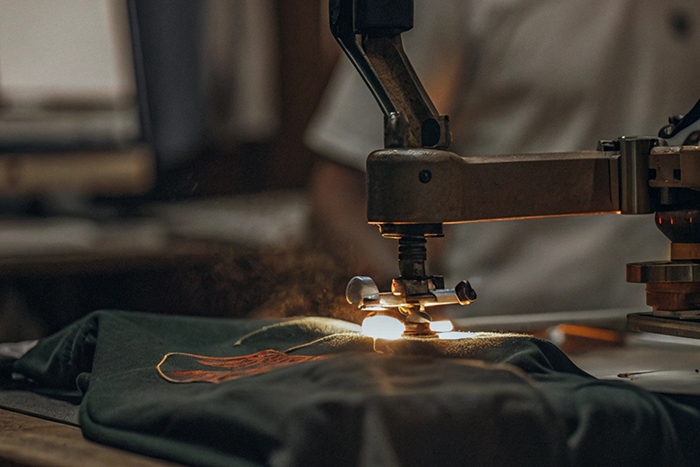
3. Embroidery
- Best For: Logos or simple, textured designs.
- Materials Needed:
- Embroidery machine4
- Stabilizer backing
Process:
- Load your design into the embroidery machine.
- Place the stabilizer on the fabric and secure the shirt in an embroidery hoop.
- Let the machine stitch the design onto the fabric.
Factors to Consider
- Durability: Choose embroidery or screen printing for long-lasting designs.
- Complexity: Heat transfer paper is ideal for detailed images, while embroidery suits simple logos.
- Fabric Type: Ensure the method aligns with the material, like sublimation for polyester or DTG for cotton.
What is it called when you put a design on a shirt?
Customizing shirts with designs involves various techniques, each with its unique name and process.
Putting a design on a shirt is called garment decoration1, and popular methods include screen printing, sublimation, and direct-to-garment (DTG) printing.
Common Garment Decoration Methods

1. Screen Printing
- Involves pressing ink through a stencil on a mesh screen onto the fabric.
- Commonly used for bulk orders and durable designs.
2. Heat Transfer Printing
- Includes heat transfer vinyl (HTV) and heat transfer paper methods, which use heat to adhere designs to fabric.
3. Direct-to-Garment (DTG) Printing
- A digital printing method that directly applies ink to fabric for high-resolution designs.
4. Embroidery
- Uses threads to stitch designs onto fabric, adding a textured and premium feel.
5. Sublimation Printing
- A heat-based process that fuses dye into polyester fabrics for vibrant, fade-resistant designs.
Additional Tips for Perfecting Your Designs
-
Test Before Finalizing
- Always test your method on a sample piece to check for color accuracy and alignment.
-
Choose the Right Colors
- Opt for contrasting colors to make your design stand out.
-
Care for Your Customized Apparel
- Wash printed shirts inside out and avoid high-heat drying to extend the design’s lifespan.
Conclusion
Putting a design on a shirt or hoodie is a creative process that can range from DIY methods like heat transfer paper to professional techniques like screen printing or embroidery. By understanding the strengths and limitations of each approach, you can choose the best option for your project. Whether you’re designing for personal use or launching a brand, the right technique will ensure your designs look polished and stand the test of time.